Cook your own climatology!
OceanFlux project offers to interested partners the ability to run their own climatology processing, selecting the parameterization and input data of their choices. This processing configuration can be defined online through a web interface. Users can then connect to the Nephelae processing platform of Ifremer/CERSAT and execute their climatology computation remotely.
This guidelines describes how you can cook your own climatology.

Registration
To register for access to the Nephalae Cloud, enabling you to access all of the open-access datasets and processing tools, you are requested to fill in the project registration form :
By registering for access to the OceanFlux GHG and Nephalae Cloud system you are agreeing to the Ifremer data access and systems terms and conditions.
Terms and Conditions
OceanFlux data and processing resources are public domain and may be used, copied and distributed free of charge. OceanFlux data and processing resources may be exploited commercially to develop revenue-generating services where measurable value is added to the OceanFlux resources by a service provider. Distribution or copying of unmodified OceanFlux resources for commercial purposes or financial gain is strictly prohibited. Users are required to acknowledge OceanFlux project in any resulting papers, products, presentations or other outreach material.
OceanFlux data and processing resources made available to users are an effort towards collaborative science. A copy of each produced data and configuration must be left accessible in the user workspace for possible sharing with other contributors.
Any resource made available through OceanFlux is not guaranteed to be: up to date, true, not misleading, free from viruses (or anything else which may have a harmful effect on any technology), or to always be available for use.
No liability shall be accepted for any losses incurred as a result of the use of these data.
You will receive a reply to your email once our account has been approved and setup.
Accessing The Nephalae Cloud
Once you have registered for access to the Nephalae cloud you should then be able to log onto the external server and access all of the datasets and tools. So if using a Linux terminal window with secure shell installed, you can use the following command to log onto the system:
ssh –X <user>@<server address>
Where <user> is your allocated user name and <server address> is the server name; both of which will be sent to you when you register. If working in a windows environment, then you will need to install a secure shell utility (like PuTTy) and configure this to connect to the Nephalae external server.
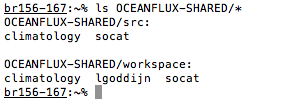
Now that you have access to the Nephalae cloud and the OceanFlux GHG datasets, it is now possible to generate your own global flux climatology. Once you have logged onto the cloud you will see that you have at least two directories with ‘OCEANFLUX’ in the name. e.g. typing ‘ls’ and hitting enter on the command line will show something like the following:

Within the OCEANFLUX-DATA directory are two text (.TXT) files:

- The README.OCEANFLUX.TXT ASCII text file gives you general information about which tools and data you can access.
- The README.OCEANFLUX.DATATREE.TXT ASCII text file gives you a visual view of all of the data that you can access.
OCEANFLUX-DATA is a directory, the sub directories of which contain the actual OceanFlux GHG datasets.
OCEANFLUX-SHARED is a directory that contains the src and workspace subdirectories:
To generate your own climatology you first of all you need to create your own workspace. e.g.:
mkdir -p ~/OCEANFLUX-SHARED/workspace/<user>/MyClimatology
and hit enter, where <user> is your username. Next copy the default configuration into your new workspace directory. e.g.
cp ~/OCEANFLUX-SHARED/src/climatology/ofluxghg-default-climatology-configuration.conf ~/OCEANFLUX-SHARED/workspace/<user>/MyClimatology/myconfig.cfg
Next, change into your new workspace directory e.g.:
cd ~/OCEANFLUX-SHARED/workspace/<user>/MyClimatology/
where <user> is your username.
Now typing ‘ls’ and hitting enter should now list your configuration file.
You can now edit this configuration file using a text editor to change your parameter choices for running the climatology.
Configuring manually your climatology
An example configuration file is shown in Annex. It allows all of the inputs for generating the climatology to be user specified (from the datasets available on the Nephalae cloud). For example, the user can select different sea surface temperature datasets, or choose between using the [Takahashi et al., (2009)] pCO2 climatology or the SOCAT fCO2 climatology.
The configuration file also enables the user to enable or disable different aspects of the flux calculation. For example, the user can choose which gas transfer velocity parameterisation to use or choose to inject random noise into one of the input datasets.
The default configuration file is fully commented in plain text and provides an explanation for each of the options. The default configuration file located with the source code on the Nephalae cloud. The configuration file is an ASCII text file. It can be edited using any basic text editor, either on the cloud (ie using the ‘nano’ linux editor) or on your local desktop machine. Please not that many popular Windows based text editors place non-standard carriage return codes at the ends of lines. So if you edit the configuration file on a Windows machine then these carriage return codes need to be removed before the configuration file can be used. The command ‘dos2linux <windows edited configuration file>’ executed on the cloud, where <windows edited configuration file> is your file, will remove these unwanted carriage return codes.
At the very least you will need to specify the directory where your results will be stored (e.g. you will need to set the ‘output_dir’ definition within your ‘myconfig.cfg’ to your newl created output directory). You may wish to download this file onto your local file system to edit it. Alternatively, ‘nano’ is a simple text editor that is installed on the Nephalae system. A simple web search using the search term ‘nano text editor commands’ will provide information on how to use ‘nano’.
There is also a portal that can be used to generate a user specific configuration file.
Configuring your climatology with the online wizard
A web interface, the configuration wizard, is provided in order to define your processing configuration : input data for each relevant parameter in the computation, parameterization (gas transfer coefficient k,...), noise and bias,...
The resulting configuration file is created in your home directory on Nephelae platform; it will be used as input to the climatology processor. You can create several different configuration files in order to test various flux calculations or assess the effect of changing the inputs.
The configuration wizard can be accessed here :
Running your climatology
Once you have edited your configuration file, your new climatology can be generated using your configuration file and the following commands:
source /home/cercache/tools/environments/scientific_toolbox_cloudphys_precise/bin/activate.csh
and hit enter. This command is to setup your username to use Python. This command should return cleanly with no messages or errors and it will appear like nothing has happened. Then type:
perl ~/OCEANFLUX-SHARED/src/climatology/ofluxghg-run-climatology.pl --config ~/OCEANFLUX-SHARED/workspace/<user>/MyClimatology/myconfig.cfg
and hit enter, where myconfig.cfg is the name of your configuration file and <user> is your username. This should start the generation of your new climatology and should take about 10 minutes to execute. The results will be written as NetCDF 4 files (one for each month) in the location that you specified in your configuration file.
By default, only year 2010 is processed but you can specify the range of years to process using the -s (or -year_start) and -e (or -end_year) options:
perl ~/OCEANFLUX-SHARED/src/climatology/ofluxghg-run-climatology.pl --config ~/OCEANFLUX-SHARED/workspace/<user>/MyClimatology/myconfig.cfg -s 2002 -e 2010
will generate a monthly climatology spanning from 2002 to 2010.
Downloading and viewing output
The resultant output from the climatology processing software will be 12 netCDF 4.0 files. One file for each month of 2010. These will appear in the output directory that was specified in the configuration file. Below is an example screen grab showing the 12 output files:

NetCDF files are a community standard file format and support and tools for this file format is available for most scientific programming languages (Python, C, IDL, Matlab etc). These netCDF output files can be interrogated using the standard command line netCDF tools e.g. typing ncdump –h <netcdf filename> will return a list of all of the metadata within the chosen netCDF file. Full usage of the standard netcdf command line tools can be found here: http://www.unidata.ucar.edu/software/netcdf/.
Alternatively, the files can be downloaded from the Nephalae cloud onto your local computer. This will allow you to view and access the output files on your local machine. For example the files can be downloaded onto the users local machine using secure copy (scp) within the ssh client. An example command (run on your local machine) would follow the form of::
scp <user>@<server address>:<full directory to output>/*.nc .
Note the dot at the end of the above command. This command would securely copy all of the netCDF files (.nc files) from the specified location on the Nephalae cloud onto the current directory on your local machine.
Once you have the netCDF files on your local machine, popular GUI netCDF viewers are ‘ncview’ and ‘panopaly’ and more information on these can be found here: http://nsidc.org/data/netcdf/tools.html. Information on netCDF toolboxes for a range of different programming languages can be found at: http://www.unidata.ucar.edu/software/netcdf/.
Example output Below is a screen grab showing some an example output (January 2010 air-sea flux) as viewed in the Panopaly netCDF viewer.
